All Dressed Up

Last month I went on a thrift shopping adventure with Holly! Not only was it a blast but we found so many treasures at Home Sense and I picked up a white 80's dresser for $45 from one of our local thrift shops. I figured it would be the perfect size for this little inlet beside our staircase...turns out it was!

Im soooo glad I had Holly's help with this dresser because I gave it a go on my own and it just wasn't transformed enough. I swear she is like a furniture superhero!

When we found it, it was white, cute, and in pretty good condition. Really it just had 80's hardware, lacked character, and had some strange drawings/writing on the side (pretty sure it was gibberish). So I brought it home and painted it a shade called Silver Dust by Behr. I felt like it hardly looked any different. Going from pure white to an almost white (with the slightest hint of grey) was just not as exciting as I had hoped for

Back to the drawing board!

I had some leftover paint from one of our upstairs bathrooms in a shade by Benjamin Moore called Stonington Grey. Yes this is still grey but it is a pale blue-grey and it was just the right shade. In comes Holly! Thank goodness! We worked on the dresser at her house and her sprayer is a gem! Holly added her distressing magic and voila!!! I am in LOVE with my new dresser!

I was pretty much at a loss for ideas when it came to the hardware for the dresser. I know what I like and I have all these ideas floating around in my head but I have a bit of a hard time deciding on an idea and rolling with it. Holly suggested that since the dresser was in the kitchen area I might like to try those sweet label holders we have seen on a couple of her pieces. What a great idea!

Here is the before:


And here is the after!:


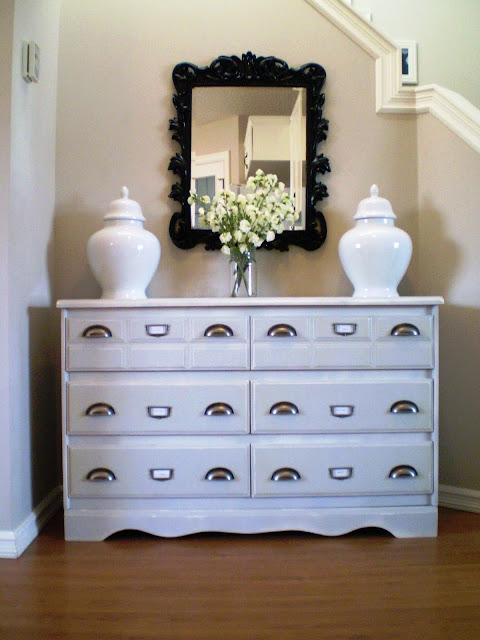
It really is more beautiful in person!
Thank you for your help Holly!
(The variation in colour between the close-ups to the farther away shots are because I took the close-ups at night so there was harldly any lighting...)
Thanks for looking! Have a great day!

Can't wait to cook under Holly's Custom Kitchen Hood Vent!

The other day I tried Holly's DIY Hood Vent from her blog http://www.inthefunlane.com/! And let me tell you, I think she deserves an award for this SWEET idea!! Her instructions are so easy to follow...even for the not-so-handy (me) and I am oh so excited about how much better our kitchen looks because of it!

I learned something about myself doing this project...I am TERRIBLE at measuring things. I can't tell you how many times I had to re-cut the molding and trim. Angles are not my forte! I really want to take a class to learn how to do this well.

For the most part I did the project myself but I did have help for two things. Nathaniel and his friend Dwayne (Dwayne gets most of the credit on this one) cut through our original hood vent which sent sparks flying everywhere!
I'm not gonna lie I was such a chicken about it and hid around the corner.

This is Dwayne hard at work!

Here is a progress shot...wishin' I paid attention during Geometry Class


I already had all the tools required so this project cost me less than $40! And the result is that our kitchen looks like its worth so much more than it actually is!

A HUGE thank you to Holly for sharing this awesome idea!! I could have never even imagined something this cool!
Here is the link to the instructions on her blog:

http://www.inthefunlane.com/2009/03/time-to-vent.html

And here it is! My FAVORITE part of our kitchen makeover!


Can't wait to share the rest of our kitchen do-over in the next day or so!

The Cats Meow!

I wanted to share a pretty neat idea I had and made happen! One big challenge I had in introducing 2 dogs into a cat friendly home was 'what to do with the litter box'?!?

I have always enjoyed the ease of having my cats be so independent and the convenience of a litter box (especially when going away for the weekend). BUT when we got our two dogs, Toto and Calypso, the cats seemed to have an aversion to their litter box. I wondered why....unitl...I realised that my dogs were 'stalking' my cats and waiting for them to do their business so they could have a snack!....yes this is nasty and disgusting but my dogs like to eat cat s***. So I needed to solve this problem, especially to calm my cats' nervousness associated with the litter box.

First step was to buy a baby-gate to put in the doorway of the main floor powder room (where I kept the litter box). This was a great temporary solution because the cats didn't mind jumping over it and the dogs could not get in to snack. However, it was a little hard for me (being much less limber than my cats) to get over the hurdle every time I needed to use the washroom.

Then I got to thinking....if a mouse can have a hole in the wall....why can't a cat?

Luckily, we have two double closets on our main floor! And one happens to be right beside that main floor powder room. So I consolidated all our jackets and shoes into the closet by the front door and turned the closet by the powder room into a 'cat den'.

Here is the back-door closet which now houses the litter box!
This is the main floor powder room which has the 'cat hole'.
And here is the hole! I know many of you might have gasped at my idea of cutting into the wall...but this has been a huge solution for me and not only can you not SEE the litter box any more but you cannot smell it ever either! Yippee!
I know its a tad messy on the rack in the closet (I need some organization baskets).
I know some cats don't like to have their litter and food in the same area but for my cats they seem to love the peace and quiet of this hide-a-way when they eat.

Yes the cat dishes say princess and both my cats are boys but it suits them pretty well!

Kato says Hi!

Sasuke is wondering what on earth I was doing in HIS home.

Best of all is my cats are happy again and I am so happy to have less mess (no litter tracked through the house), no smell (at least I can't detect any), and my guests don't have to see the litter box when they use the washroom anymore!

DIY Feather Inspired Napkin Rings and Hair Pieces

Today I woke up and discovered a pile of blue feathers on the floor! I was so worried one of the cats had got a bird but it turns out they had eaten one of my feather hair pieces! Oh man! I loved this thing and it was not cheap! I bought two of them from Urban Outfitters at Christmas and they were $28 each. I gave one to my sister for Christmas and kept the other one for myself. Here is a picture of me at New Years wearing the one I gave to my sister.

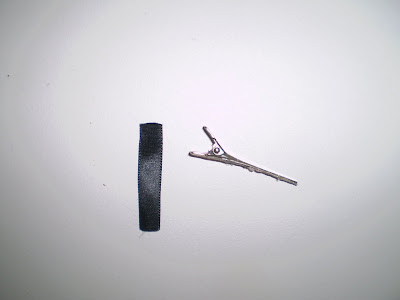
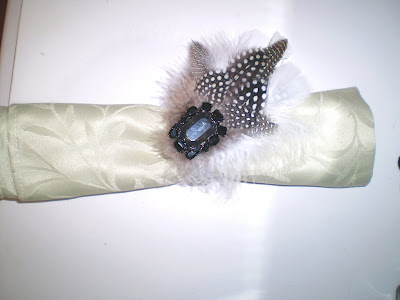
Here is what was left of my pretty hair piece! Darn cats!

So I decided to do a little DIY project! Why not try and make one myself? I thought I might as well make a few of them because they would make perfect gifts for my friends (especially for an upcoming wedding I'm going to). I went to our local craft store and picked up some self adhesive felt, some feathers, some jewels, some ribbon & lace, and some clips.

I also used some of my plain headbands I've had for awhile now and never wear.

The feathers were about $4.50 for a package.

These feathers came with a cloth backing already applied! I used this to make a new headband like the ones I've seen in Urban Outfitters.

I cut out tear drop shapes from the felt. I used these as the base for the feather pieces. I liked the self-adhesive because it made sticking the first layer of feathers very easy!


Here are the clips (I got from the drugstore) I used a piece of ribbon to place in between the clip so that I could still open it once its glued on the feather hair pieces.


Here are some of the feather hair pieces I made! I had lots of fun making these!


Nope sneaky kitty you are not going to eat any of these ones!

Another idea is to use these feather pieces for napkin holders! I got these pretty napkin rings from Home Sense on Clearance for $3 each and glued some of the feather pieces to them.


This would also make a pretty hand-made gift for someone! Or be a nice touch for a dinner party.


Hope you like them! I can't wait to make some more! Now that I've had my first go at it I might try and make some more intricate looking ones next time!